How do I choose a grip?
Many factors go into the design of a grip. These are things such as grip angle, grip body width, throat width, throat size, face angle, and nose shape. Other grip features such as points, lines, or thumb knuckle pockets help to position the hand so you do not have to look, but just feel where the hand is on the grip.
Traditional grips (Olympics back in the day) tended to have a rounded face with little to no distinguishing marks to help with hand positioning. An archer just “figured it out” over thousands of shots, especially if that archer did not have a coach or information telling you how to grip the bow. Jager Archery started this journey by adding features that aided hand positioning with feedback from a variety of high-performing archers. Today, we have a multitude of grips for places to start your archery journey. An archer may start with one grip but migrate to other grips as they grow in the sport.
How to hold your grip
How an archer holds a grip is very important as this tends to be how most grips are designed. Shown below is the go-to image for do’s and don’ts for the overall positioning of the hand on the grip.

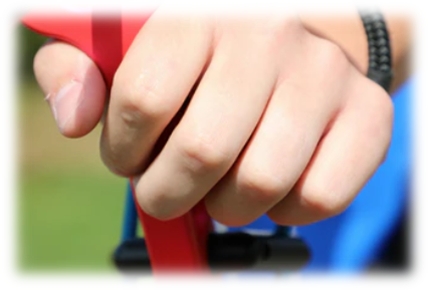
The first question is usually why someone should hold a grip like this? What’s wrong with holding it like a pistol? There are two major reasons. One is to help rotate the elbow to create more clearance between the bow arm and string. The other is to remove influence or torque by gripping the bow too tightly during the shot process. When you see a person with a big bruise on their forearm, this is generally why is because of improper hand position.
Grip Terminology
Before getting into grip specifics, we’ll cover the terminology we use to describe the grip.
- Nose: The portion of the grip between the top of your hand and the riser. Some of these are flat while others, like the Jager Archery CMS grip, set the hand into an optimized 45-degree knuckle position.
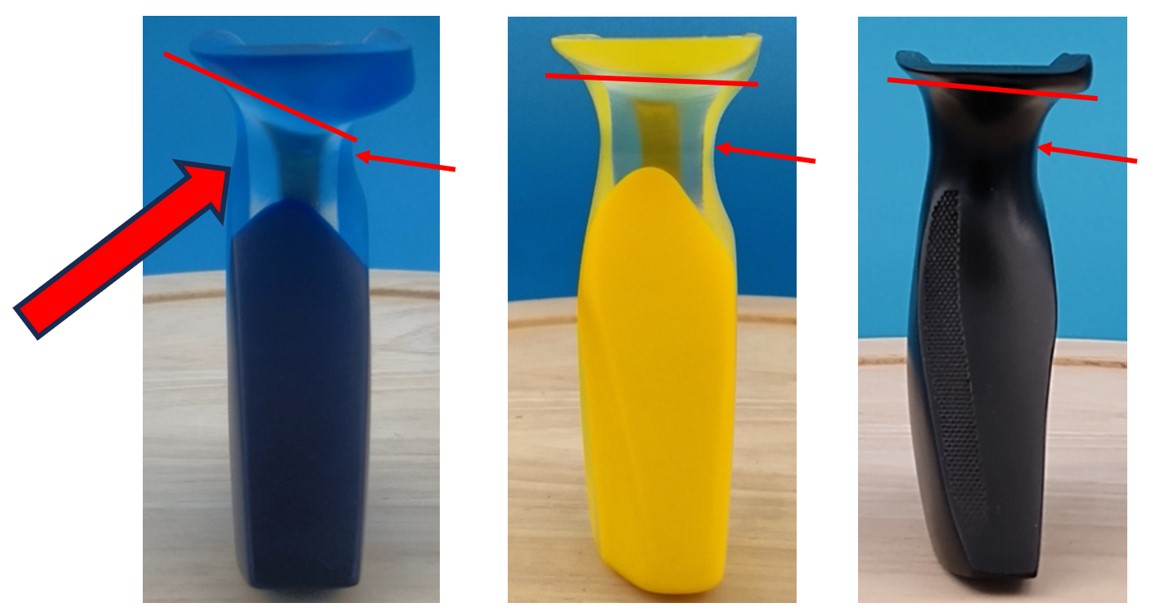
- Throat: The portion of the grip between the nose and face of the grip. These come from small to large. The smaller the throat, the harder it may be for larger-handed folks as it may squeeze the hand and feel uncomfortable, especially the higher the grip angle. More on that later.
- Face: The portion of the grip your palm pushes against. These come in a variety of shapes from round to flat, with different widths and angles.

- Grip Bed: This is the inside of the grip that mates to the riser. There are many design varieties depending on the manufacturer and even inside an individual manufacturer may have different beds. For instance, Hoyt, Win & Win, Gillo, and SF all have different grip beds and mounting holes. SF and Win&Win have a couple different grip beds based on riser model.
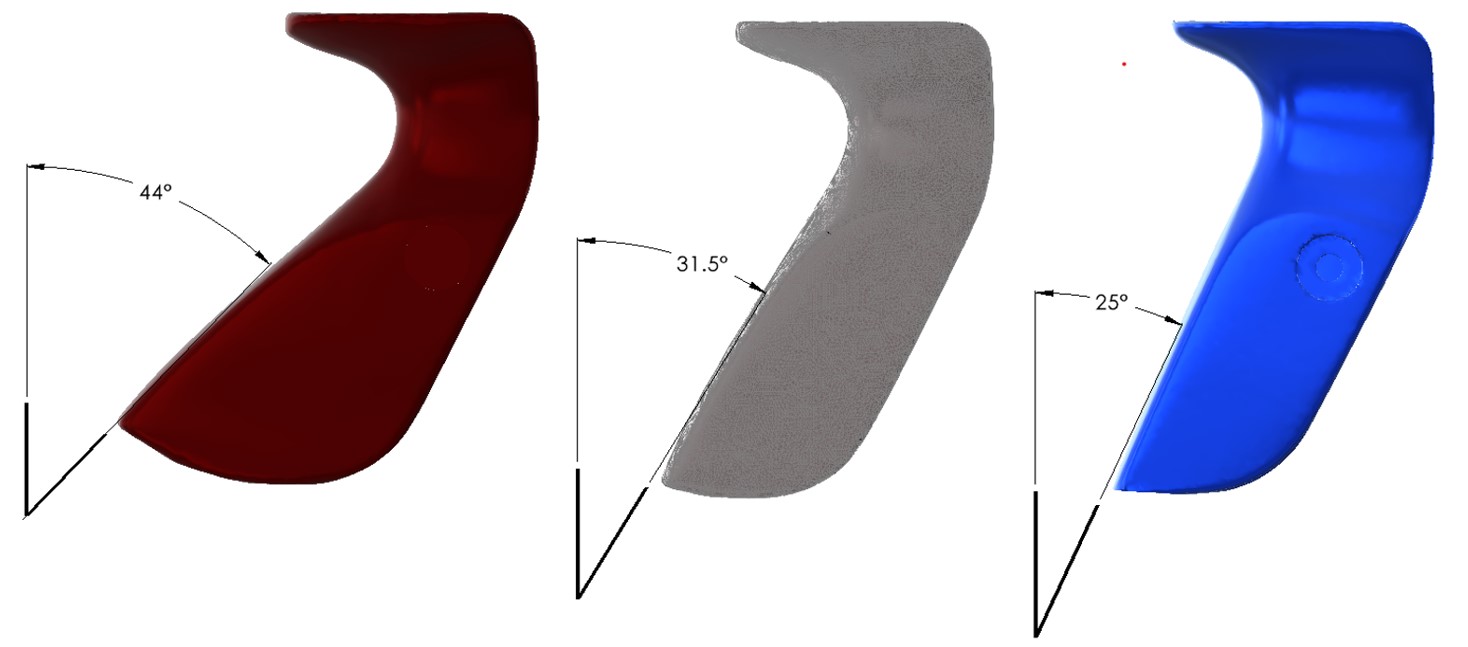
- Grip Angle: The angle relative to a horizontal plane relative to the ground. The higher the angle (40’s), the more Olympic-style shooting it is used for. Barebow, in general, uses more of a low to medium grip.
- Grip Front / Name: Jager Archery uses this to assign a name to the style. For instance, JD3, CMS, Pinnacle, Brady Ellison, or Casey K.
What do I have now?
An archer wanting to try a new grip may want to stay with a similar grip angle. Major angle adjustments take hundreds of shots to acclimatize to. To compare an existing grip angle to a new grip, this is how we would suggest starting. Take the grip off the bow, turn it upside down, and measure as shown. An electronic angle measuring device makes quick work to simply rotate it up and lay it against the grip face, but a protractor could be used as well. It’s just a little harder to get the tangent angle with the small, graduated marks.
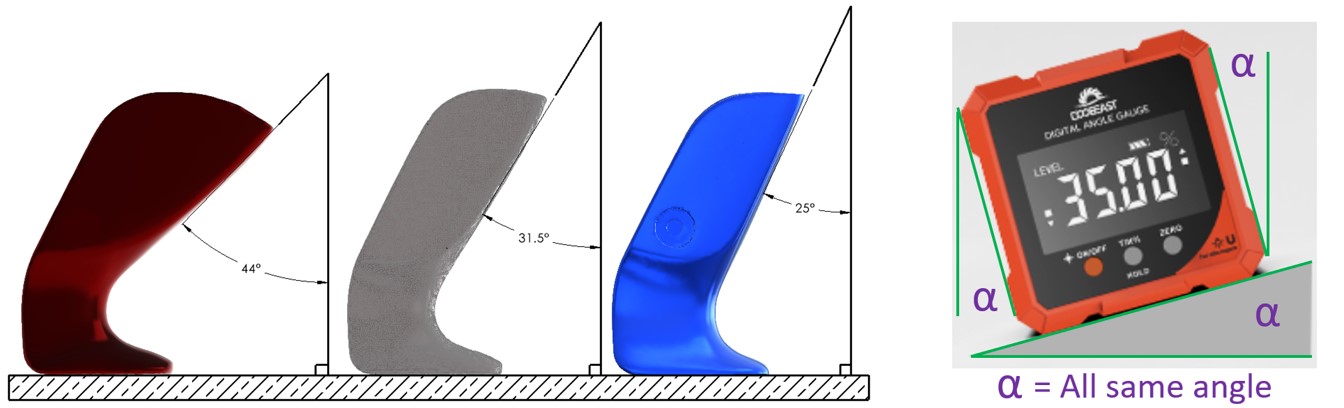
Using this information, a starting point can be determined. Compare using the grip chart to see grip angles and look at what is available. Please note that we do not have all grip styles for all models of risers.
Our Grip Lineup
We offer an extensive lineup of grips. Take a look at the new 2025 products and the Shop dropdown for classic grips.